Tuesday, July 14, 2015

Pistachio Ice Cream


Nothing says summer like homemade ice cream!


I love everything about ice cream. For a wedding present we received a cuisinart counter top ice cream maker, and it is definitely one of my favorite things (even if it doesn't get used nearly often enough). I never seem to plan far enough in advance to have the bowl frozen and the ingredients on hand when I am ready to eat ice cream, so I usually just end up going out for a cone instead. Last summer I discovered a love for pistachio flavored ice cream thanks to the delicious one at Lizzy's in Waltham, and a couple of weeks ago I decided to try and make my own. I used a no-cook Southern Living base recipe which is by far my favorite no cook ice cream method I have found. I have not yet adventured into the kind you have to cook before freezing, but if I ever do I will write a comparison.


The mix is simple enough. Mix everything together and put in the fridge overnight. The hardest part was shelling all the pistachios (I highly recommend buying the shelled ones). We had several bags that had a few pistachios left in them, so I decided to just combine eveything we had and hope it was enough. I discovered while shelling the second bag, that they were actually salt and pepper flavored. Oops. So I shelled them all anyways and then just washed them off in a colander before throwing them in the food processor. Worked good enough and the final product did not at all taste like pepper I am happy to report.


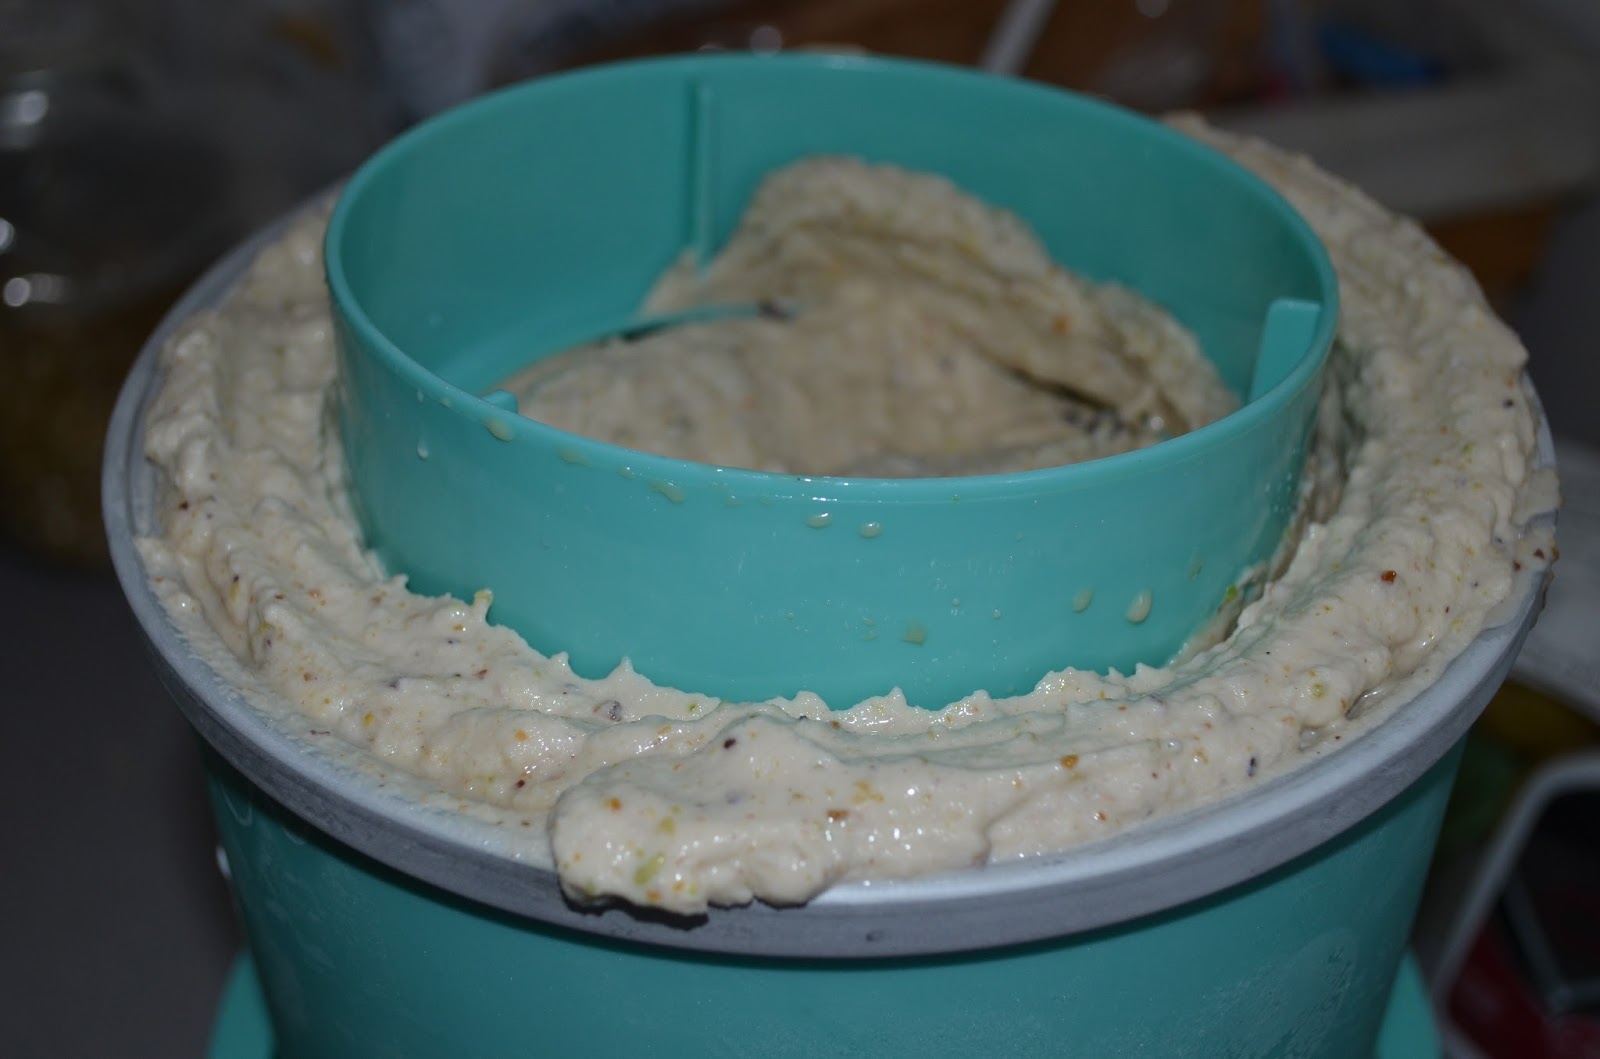
I decided to add mini dark chocolare chips to the mix, because why not? I like to use mini chips in ice cream instead of regular size ones because they can get pretty hard when frozen, and no one likes broken teeth. I also froze the ice cream maker bowl for the required 24 hours. The next evening I took everything out, poured it in, turned it on for 30 minutes, and...


Nothing. I don't know what was going on that night, but my ice cream did not freeze at all. Cue some frantic googling to figure out if maybe I added something I shouldn't have to the recipe before freezing. I couldn't find any conclusive answers, but it was a hot night, and I had been running the oven for awhile to cook dinner, so I decided to try and salvage what I had by dumping all the mixture back into Tupperware, washing and refreezing the bowl, and turning our refrigerator down a few degrees. Either the colder temperature or the extra time did the trick, because when I ran it again the next morning, I got delicious, creamy, frozen goodness in only 20 minutes.


I scooped it all into Tupperware and tuck it back in the freezer for a couple hours, and the texture came out perfectly. By far the best ice cream mix I have used, not at all hard or icy and the perfect, scoopable density.


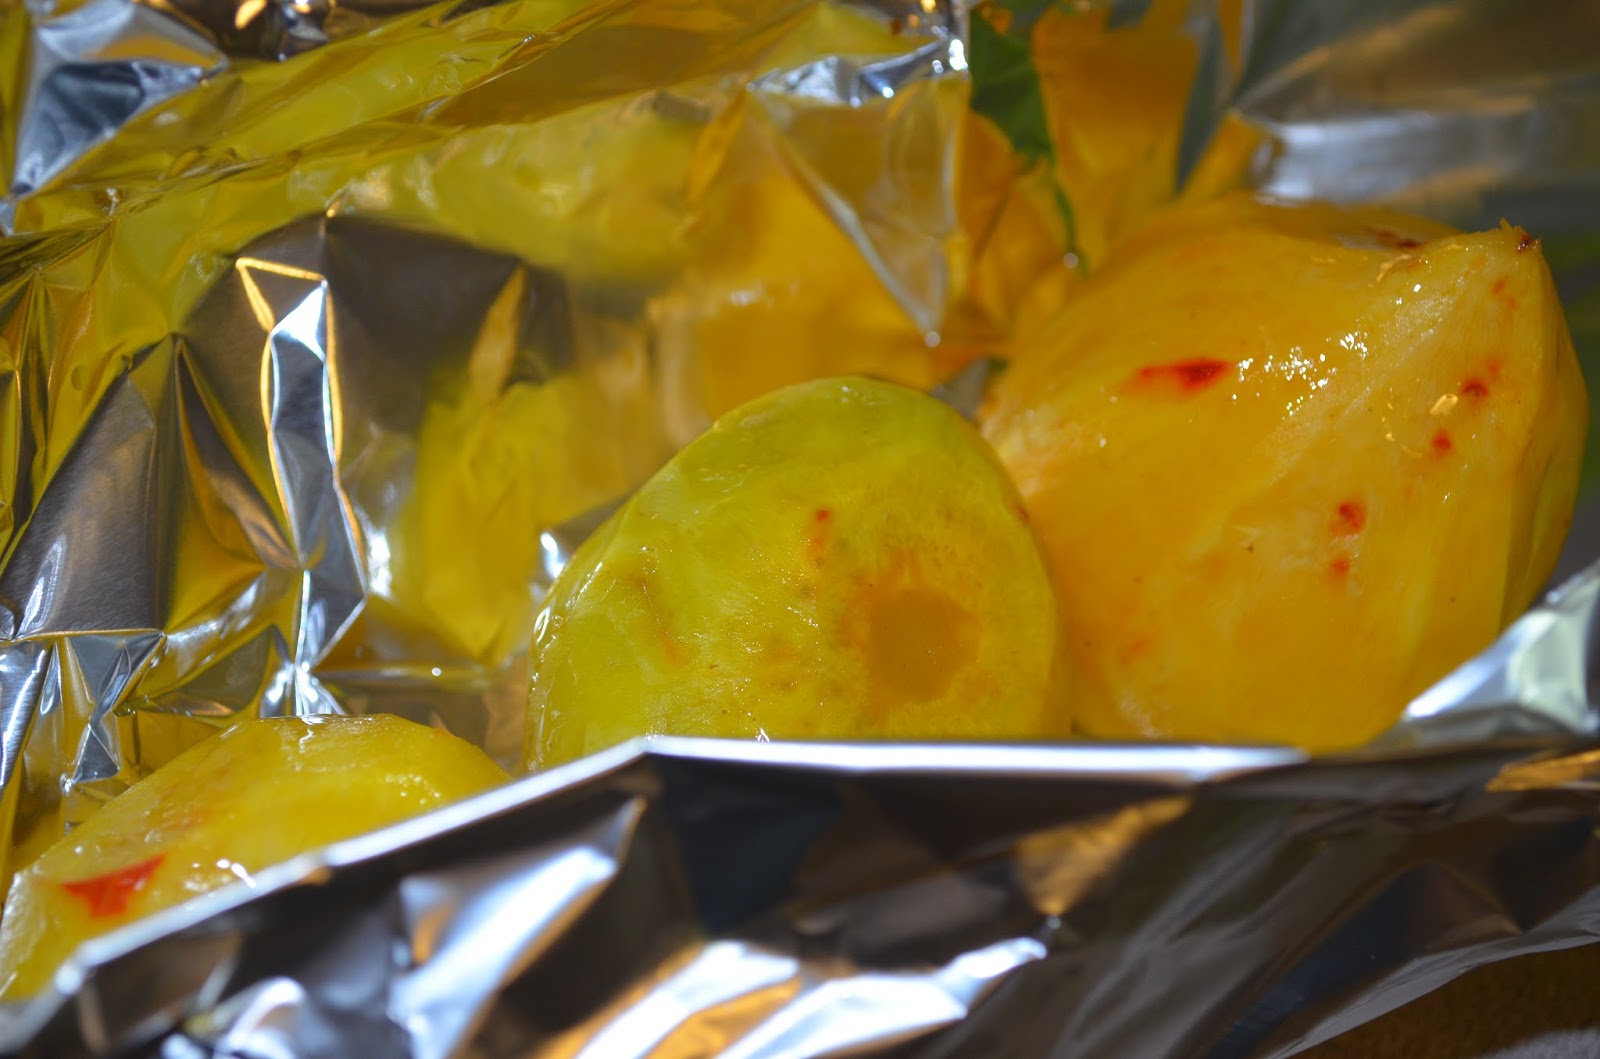
In veggie news, I have tried some not so great recipes this week that didn't work no matter how hard I tried to save them. My beet chips that I have been so excited to try never got crispy, and while they tasted great, the soggy texture was really hard to eat. I don't know if I added too much oil, cooked at the wrong temperature, or what, but after doubling the time on the starting recipe they were still soggy. I also tried roasted radicchio this week using a basic olive oil, salt, balsamic, and parmesean recipe but I couldn't stand the texture, and the bitterness really stood out to me in a way that mixing the raw radicchio in a salad didn't. Those will probably be eaten raw from now on. refrigerator dill pickels came out great, if not a little too vinegary, but you won't hear me complain.

Pistachio Ice Cream
1 (14 ounce) can sweetened condensed milk
1 (5 ounce) can evaporated milk
2 cups whole milk
4 tbsp granulated sugar
1 tsp vanilla extract
1 tsp almond extract
1 cup roasted pistachios (shelled)
mini chocolate chips (optional)

1) Combine milks, 2 tbsp sugar, and vanilla and almond extract in a bowl. Whisk until well blended
2) In the food processor, combine shelled pistachios and remaining 2 tbsp sugar. Pulse until finely ground. Add ground pistachios to liquid mixture, and refrigerate at least one hour, but preferably overnight. 
3) Add liquid mixture to ice cream maker, and follow churning instructions. Add chocolate chips when mixture is partially frozen, about half way through, so the churning action mixes them thoroughly into the mixture.
4) When done churning, (20 minutes with my machine) remove from ice cream bowl, place in Tupperware container, and transfer to the fridge. Let rest for at least one hour before serving.


Monday, July 13, 2015

Roasted Beet Fudge Cupcakes


We are drowning in vegetables thanks to our CSA. It has been fun trying to find new ways to make veggies that I would never have sought out to buy myself, but I enjoy none the less. So far I have made a lot of pasta salad type dishes, a lot of salads, a lot of veggie fries, and a lot of veggie covered pizzas. This week I also made senposai hand pies (adapted from this recipe) which were delicious and made great reheatable lunches this week.

I also have been trying to incorporate what we have into baked goods and deserts, to get a little variety. I have tried to make brownies with roasted beets in the past, and while I enjoyed them, they definitely had a strong earthy flavor. This time around was much more successful, which I credit to using golden beets instead of the typical red ones. Golden beets are an awesome bright orange color when raw, and they supposedly have a much more mild flavor than the red ones.

The first step is to wash and peel your beets, followed by roasting them. I put them in some tin foil, drizzled a little bit of olive oil on top, and then wrapped the package up and stuck it in the oven at 375 degrees for about an hour, or until the beets are nice and soft.


Once the beets come out of the oven, take the whole package and put it in the refrigerator to chill, preferably in a bowl to catch some of the juice that might leak out. If you open the foil a bit it will probably cool faster, but they can get messy. Once the beets have reached room temperature, throw them in the food processor and blend until creamy. The recipe uses 1/2 cup of this mixture, and the rest can be frozen in a ziplock for future baked goods, or stirred into a mac and cheese. 2 good sized beets gave me about 1/2 cup of puree.


This mixture is combined with buttermilk, sugar, oil, and vanilla extract. Then flour, cocoa powder, baking soda, baking powder, and salt are sifted in and mixed until there are no large lumps remaining. The batter still had a distinctly beet like smell which went away once they were cooked. I unfortunately ran out of paper muffin cups, but I sprayed the muffin tin heavily with Pam and they came out with out too much of a fight.


I like to ladle my cupcakes using a measuring cup, so that they all turn out roughly the same size. Bake for just over 20 minutes, then transfer to a cooling rack to let cool completely.


They are good on their own, like a dense cakey brownie, but even better when topped with cream cheese frosting. I stuck cream cheese in the mixing bowl, then poured in powdered sugar while blending until the consistency seemed about right. I love my kitchenaid stand mixer, but I find hand mixers to be much better for making frosting. I then continued to beat the cream cheese for about 5 minutes on a high speed to incorporate some air and make it nice and fluffy. 

picture

Someone teach me to frost cupcakes nicely? I admit I care more for delicious than I do for pretty.

Roasted Beet Fudge Cupcakes

1/2 cup of roasted beets, blended
1 cup milk (I used heavy cream the first time, and 2% the second time, and both were delicious)
1 tsp apple cider vinegar
3/4 cup granulated sugar
1/4 cup canola oil
3 tsp vanilla extract
1 cup + 1 Tbsp all purpose flour
scant 1/2 cup unsweetened cocoa powder
1 tsp baking soda
1/2 tsp baking powder
pinch salt

1) Preheat oven to 375. Mix together the milk and vinegar in a bowl or measuring cup, and let sit to curdle. Combine the sugar, oil, vanilla, beets and milk and mix until foamy.
2) Add the dry ingredients slowly to the mixer while running to avoid clumps. Mix until no large lumps remain. Mixture will be a runny batter
3) Pour into a lined or greased muffin pan and bake for 22-25 minutes, or until a toothpick inserted comes out clean.
4) Remove from pan and cool on cooling rack. Coat with powdered sugar, cocoa powder, or your favorite icing once cool.

Inspiration recipe here

Tuesday, June 23, 2015

Strawberry Rhubarb Crisp Bars


This year I discovered a wonderful thing called rhubarb. I have heard about it, and maybe had some in a store bought pie before, but had never actually bought any. I signed up for a CSA this summer, and our first two weeks both included rhubarb, so I have been working to find ways to use it. Last week I made some strawberry rhubarb muffins, which were great. This week, its crisp bars. I was hoping to make a sort of oatmeal cookie, but was worried about the amount of liquid from the fruit, so a crisp bar was a compromise. 


The hardest part of this recipe was dicing up all the fruit. Seriously. Also I peeled my rhubarb this time, although I didn't in the muffins and they turned out perfectly fine. I like a little fruit texture to my bars, so I only quartered the strawberries, although the rhubarb I diced pretty finely. In retrospect, the strawberries should probably be smaller as well. You live you learn.

The crust / topping can be mixed directly in the pan, using your hands. Less dirty dishes is the name of the game around here folks. After mixing I took out about a cup worth, and pressed the remaining mixture into the bottom of the pan. I didn't grease the pan at all because I planned on serving them directly out of it, but if you wanted to take these somewhere fancy you could do that or line it with parchment paper.

Then, dump in your fruit, sprinkle with some sugar and lemon juice, and crumble the reserved topping on top. It was that easy. 

On a side note, I hope that my next kitchen has much better light for taking food photos. We get tons of natural light, but unfortunately I do most of my cooking at night, and most of the artificial light comes from a lamp across the room. Maybe after we move I will have some better pictures.

Strawberry Rhubarb Crisp Bars
1 cup rolled oats
3/4 cup all purpose flour
1/2 cup brown sugar
1/4 teaspoon salt
6 tablespoons unsalted butter
1 teaspoon cornstarch
1 tablespoon lemon juice
1 tablespoon sugar
1 cup diced rhubarb
1 cup diced strawberries
powdered sugar for topping

1) Heat oven to 375 degrees. If desired, line or grease 8x8 inch square baking pan
2) Place oats, flour, brown sugar, and salt in bottom of baking pan and mix. Melt butter and pour over top. Mix together with hands to form clumps (careful to avoid butter burns). If dough is not sticking together, add more flour approximately 1 tablespoon at a time.
3) Remove approximately 1 cup of mixture. Press remaining mixture flat into bottom of pan.
4) Spread diced fruit evenly over crust. Sprinkle with sugar, lemon juice, and cornstarch.
5) Sprinkle remaining topping over the fruit. Bake at 375 for 30-40 minutes.
6) Let cool in pan. Sprinkle with powdered sugar before serving, and store leftovers in the fridge.


Monday, September 8, 2014

Egg Muffin Cups


I have seen a lot of recipes for egg muffins, for an easy take and go breakfast. With my new job, I find that I am not able to eat as often throughout the day and I definitely need something more substantial in the morning. Best part of these: no recipe required. I used summer squash and green onions, plus a few fresh basil leaves, because that's the veggies I had on hand. Used a mix of leftover shredded/crumbled cheese that was in the fridge. Used buttermilk instead of regular milk because my hubby bought a giant container of it the other day and why not?


Egg Muffin Cups
6 large eggs
1/4 Cup Buttermilk
1 medium summer squash, grated
3 stalks green onions
6 slices bacon, chopped
1/4 cup shredded cheese
salt, pepper, basil

Preheat oven to 350. Whisk 6 large eggs together in bowl. Add buttermilk (or milk) to desired consistency. Stir in veggies, cheese, and spices. Grease muffin tin and fill muffin cups 3/4 of the way full. Bake for about 20 minutes.

Saturday, August 23, 2014

Funfetti Cookie Disaster


Today we were invited to a game night, and asked to bring some snacks. I decided to do a re-try of my bourbon salted caramel ice cream, and then make some funfetti cookies. The ice cream still didn't come out perfect. The bowl for the ice cream maker did not have enough time to freeze, and so the ice cream wasnt setting up enough. I decided to forgo the bourbon (since it can effect freezing ability due to the alcohol) and just made a salted caramel version that did most of the setting up in the freezer. Not a big deal.

The big disaster came later. I made the funfetti cookies according to this recipe which are super simple and super delicious. I set my oven timer for the minimum of 8 minutes, and walked away to watch some TV. timer goes off, I come back to check, and smoke is pouring out of my oven. I open it up to find this:


The worst when baking cookies. I honestly am not sure what happened, because the tops and insides of the cookies are cooked perfectly, and the bottoms are crispy charcoal. I checked other versions of the recipe, but they all use the same oven temp, and I have never had problems with my oven running too hot before.


I definitely didn't want to serve these, so I sent my husband to the store for another box of funfetti (even though this is against my whole life philosophy) while I tried to google what would make only the bottoms of my cookies burn this badly. In the midst of my searching, I found a suggestion that you can grate off the burned bottoms and they will be good as new. What?!


I used the small side of my regular grater, and rubbed them on gently. They still aren't perfect, but they taste good enough that I am not embarrassed to serve them and didn't have to make another batch of cookies. I still have to figure out what's going on with the oven, but at least today's disaster was averted. 
Cookie dust anyone?

Saturday, August 16, 2014

Taste of summer


There is something about summer which requires absolutely everything to be grilled. Unfortunately, I don't have any outdoor space, and therefore can't set up a grill unless I want to do it in my parking spot. So tonight, I improvised.


Those are fresh nectarines that I grilled on my cuisinart griddler. I wasn't sure how the griddler would work for fruit, but they turned out great! Just heated the griddler to a medium heat, sprayed with cooking spray, and payed them cut side down. I discovered if I shut the lid really quickly it would keep the nectarines in place, if I tried to close it slowly they just slid across the non stick surface and smushed themselves at the front of the plates. 

After I cooked them for about 10 minutes, I lightly dusted with some brown sugar. Delicious alone and also paired with the bourbon salted Carmel ice cream I made last night :). Have to work on the recipe for that one because the creaminess did not reach desired levels, but the flavor was delicious. 

Sunday, May 4, 2014

Homemade Tater Tots


Guys, I discovered you can make tater tots at home! This is the best/worst thing that has ever happened to me. Best because they were delicious, and a totally different texture than the store bought ones, and super easy to make. Worst because they are delicious, they were super easy, and I could probably eat multiple servings multiple nights a week and not get bored of eating them. Here is an up close photo of the delicious final project:


The process is really simple. Bake some potatoes, shred them up, season, and fry. I looked at some recipes online for some guidance, but ultimately just made it up. We recently bought a new personal size deep fryer with some remaining gift cards from the wedding, and I had been waiting to try it out.

The potato mixture. I baked mine before shredding, because nothing is worse than biting into a tot only to find raw potato inside. When I shredded them using a grater, they ended up forming more of a mashed potato consistency. It ended up being delicious, and Hubby mentioned he liked it more than the typical shreds. Next time I might try baking them for half the time to get the original texture, but who knows, these were delicious.

I formed the tots then placed them on a baking sheet while heating up the oil (took about 10 minutes to shape about 45 tots). I put my playdoh skills to work, rolling them into snakes then smushing the ends to get the tot shape.


Fried in 350 degree oil for about 4-5 minutes. Fried them in batches of 15 in my mini fryer. Could have probably done more, but I wanted them to have room to circulate.
Put them on some paper towels over a plate to drain off excess oil, and sprinkled with shredded cheddar cheese while still warm so it would melt. I also topped them with a siracha ranch dressing when I ate them. Delicious!


Home Made Tater Tots
2 large potatoes (I used Yukon Gold because that's what I had on hand, but most recipes I found suggested Russet)
1 tbs flour
1 tsp salt
1/2 tsp garlic powder
enough vegetable oil to fill your pan or fryer

Bake potatoes. I usually do this in the microwave because its super fast and easy. Just wash them, poke a few holes, and stick them in the microwave for about 10 minutes, or until soft, checking and rotating them every 2 or 3 minutes. Stick them in a bowl of cold water to cool until you can handle them. Shred them using a box grater (I think the food processor would have pulverized them too much). As I shredded, the peels mostly peeled off on their own, and I threw away the large pieces of peel. Mix in the flour and spices by hand. Begin to heat oil to 350 degrees, and then shape them into tot shapes. When the oil has heated it should bubble vigorously when you drop in one of your tots. Put them in the oil for 4-5 minutes. I didn't turn mine, but if you are frying them in a shallow pan instead of a fryer you might need to do so. remove from oil, and place on paper towels to drain. Top with whatever your heart desires!